
What to Know Before Choosing a Kitchen Backsplash
Most backsplash guides tell you to “consider your style” and “match your countertops.” That’s not wrong, but it doesn’t help when you’re standing in a tile showroom trying to choose between 200 options.
Here’s what actually matters, including the things most guides skip.
Material Isn’t Just About Looks
The area directly behind your cooktop takes more abuse than anywhere else in your kitchen. Before picking something based on aesthetics, understand what you’re asking the material to handle.
Ceramic and porcelain are the most practical choice for most Austin kitchens. Both are fired at temperatures far exceeding anything a gas or electric burner produces, non-porous, and easy to clean. The difference between the two is that porcelain is denser, less absorbent, and more durable. Worth the slight price difference for a floor-to-ceiling installation or any area near high heat.
Natural stone looks expensive because it is, but the long-term cost goes beyond the price tag. Austin’s water hardness runs at 184 parts per million, well above the threshold that causes mineral deposits and limescale buildup. On an unsealed or under-sealed stone backsplash, that hard water leaves a residue that’s tedious to remove and eventually etches the surface. If you’re committed to natural stone, plan to seal it every six months.
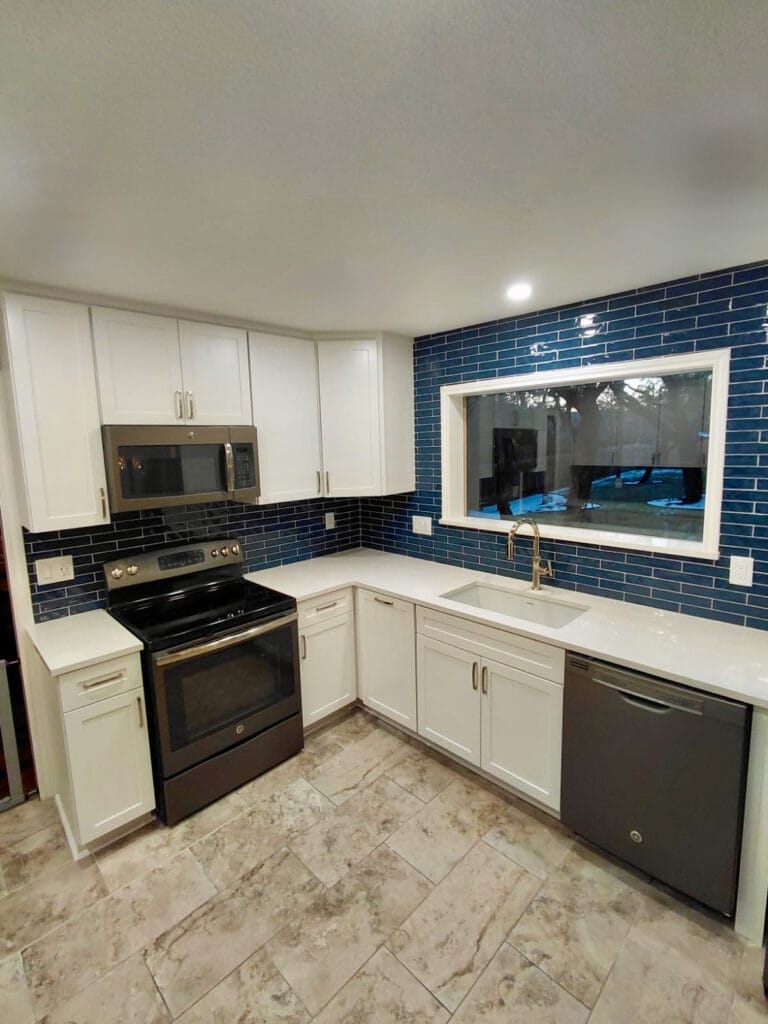
Glass tile adds reflectivity and works well in kitchens with limited natural light. Avoid textured or matte glass behind the cooktop. Grease and steam embed in the surface and are significantly harder to clean than smooth glazed tile.
Metal backsplashes (typically stainless steel or brushed aluminum) look clean in contemporary kitchens but show fingerprints constantly. In a working kitchen that gets daily use, you’ll wipe them down more than you’d expect.
Peel-and-stick tiles work for low-heat areas like behind the sink, but should not be used directly behind a gas range. Most standard peel-and-stick products aren’t rated for sustained heat exposure, and adhesive failure near a burner creates a real safety issue.
The Grout Decision Is as Important as the Tile
Most homeowners pick their tile first and treat grout as an afterthought. That’s backwards. Grout color determines whether your tile pattern reads boldly or disappears into the wall, and it has a direct impact on how much maintenance you’re signing up for.
Light grout looks crisp but requires more upkeep. White grout on a busy cooktop backsplash will discolor within months without consistent sealing and cleaning. If you love the look of white subway tile with white grout, use epoxy grout rather than cementitious. It’s non-porous, stain-resistant, and doesn’t need sealing.
Dark grout hides grease and everyday grime far better, but visually emphasizes the grid pattern of the tile. On a classic 3×6 subway tile, dark gray or charcoal grout reads as more contemporary and graphic than the white-on-white look.
Grout width changes the visual scale of any tile. Narrow grout joints (1/16″) make large-format tiles feel like a continuous surface. Wider joints (3/16″ or more) on small mosaic tiles emphasize the pattern but give grease and food particles more places to accumulate.
One rule for natural stone. Match the grout to the darker tones in the stone, not the lighter ones. It visually recedes the grout line so the stone reads as continuous rather than gridded.
Standard Height vs. Full Height
Most guides treat this as an aesthetic choice. It’s also a practical one.
A standard-height backsplash runs from the countertop to roughly 4-6 inches up the wall. It’s the most cost-effective option and works well when the countertop material is the visual focal point, especially with quartz or stone counters where the backsplash in the same material ties the surfaces together.
A full-height backsplash runs from countertop to the bottom of upper cabinets, typically 15-18 inches, or all the way to the ceiling if there are no upper cabinets. It protects more wall area, reads as a stronger design statement, and is increasingly the expectation in mid-to-upper range Austin kitchen remodels in 2025-2026.
The case for full height in an Austin kitchen specifically. The area between countertop and upper cabinets takes splatter, steam, and grease every time you cook. A 4-inch backsplash leaves the remaining wall exposed, and painted drywall is not a surface that handles repeated grease and moisture well.
If budget is the constraint, go full height behind the range and use a simpler or shorter treatment behind the sink and prep areas.
Safety Clearances Behind the Cooktop
This is something almost no backsplash guide covers, but it matters.
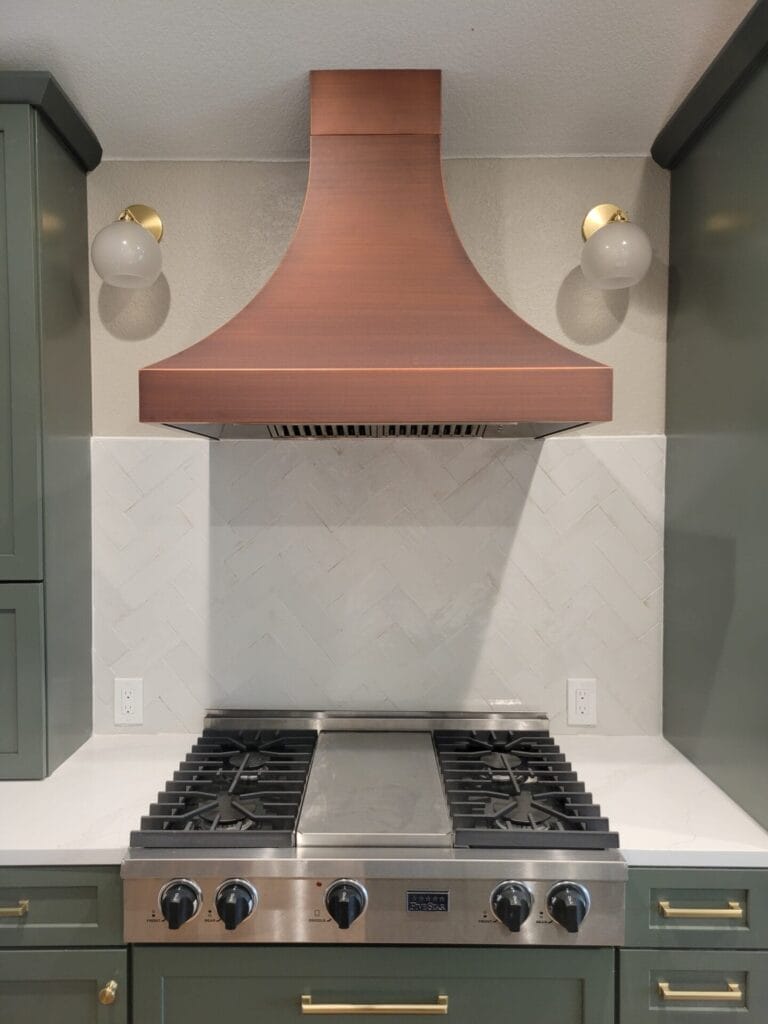
For a gas range, non-combustible materials (tile, metal, stone) must extend at least 6 inches beyond the appliance horizontally. The vertical clearance between the cooktop and any combustible material above it (like wood cabinets) needs to be at least 30 inches. Tile handles this without any special consideration, but it’s worth knowing if you’re using a thinner panel product or an alternative material.
Peel-and-stick and polymer-based backsplash products are the ones to check carefully near any burner. Some require the burner to be at least 6 inches from the edge of the product to avoid adhesive failure. Always check the manufacturer’s installation instructions before placing these near an active cooking surface.
What’s Working in Austin Kitchens Right Now
The all-white kitchen with white subway tile and white grout is fading. What Austin homeowners are moving toward in 2025 and into 2026 is warmer, more textured, and more specific.
- Terracotta, warm clay, and earthy greens replacing cold blues and whites as backsplash accent colors
- Zellige tile, a handmade Moroccan clay tile with slight variation in each piece, adding texture and warmth that mass-produced tile can’t replicate
- Stone slab backsplashes (a single continuous piece of quartz or quartzite run up the wall) eliminating grout lines entirely
- Larger format tile, 12×24 or larger, replacing 3×6 subway for a more contemporary scale
- Two-material combinations, a stone slab behind the range as a focal point with simpler tile across the rest of the backsplash
If you’re staying in the house long-term and want something timeless, natural stone slab or large-format porcelain in a warm neutral have held up for decades and will continue to. If you’re remodeling to sell in the next 2-3 years, warm earthy tones in a clean format read better to current Austin buyers than the all-white look.
Installation Order and Common Mistakes
Install the backsplash after cabinets and countertops are in place, not before. The backsplash should terminate cleanly against finished surfaces. Installing it first means you’ll be adjusting cuts to fit, and that leads to visible gaps or awkward filler strips.
Ending the backsplash abruptly, stopping it mid-wall rather than at a natural terminus like a window frame, cabinet edge, or corner, is one of the most common installation mistakes. It makes the space feel unfinished. Plan your termination points before you select or order tile.
If your cuts need to be precise around outlets, window frames, or irregular surfaces, and they usually do, this is worth hiring out. A crooked cut around an outlet is visible every day. Retiling to fix it costs more than getting it right the first time.
Budget Expectations in Austin
Ceramic and porcelain tile installations in the Austin market typically run $15-$40 per square foot installed, depending on tile cost and pattern complexity. A standard kitchen backsplash area (roughly 30-40 square feet) should be $600-$1,200 for a straightforward ceramic installation. Natural stone, large-format slab, or complex pattern work pushes that higher.
Material waste is a real factor. Intricate patterns, herringbone, and diagonal layouts generate 10-15% more waste from cutting than straight-stack installations. Order accordingly.
Want help choosing or installing a backsplash? Call us at (512) 761-7336 or reach out online. We handle kitchen remodels across Austin and give straight answers on materials, layout, and cost.
Frequently Asked Questions
Does a backsplash actually protect the wall, or is it mostly decorative?
Both, but the functional case is stronger than people realize. Drywall behind a cooktop absorbs grease, steam, and moisture over time, eventually staining permanently and in some cases developing mold behind the wall surface. A properly installed, non-porous backsplash prevents all of that. The protection argument is strongest directly behind the range. Everywhere else is more cosmetic.
How does Austin’s hard water affect backsplash maintenance?
Austin’s water hardness is 184 parts per million, driven by the limestone geology of the Edwards Aquifer. On a glass or glossy tile backsplash behind the sink, mineral deposits appear as white haze within weeks of installation. A squeegee after washing dishes eliminates most of it. If you have natural stone, hard water accelerates the need to reseal. Plan for every six months rather than annually.
Can I tile over an existing backsplash?
Sometimes. If the existing tile is firmly adhered with no cracked, hollow, or loose sections, tiling over it is possible. The trade-off is the added thickness changes how outlets and switch plates sit in the wall. You’ll need extension rings to compensate. If the existing tile is uneven or partially failing, tear it out first. Tiling over a bad surface delays the problem.
What’s the real difference between sanded and unsanded grout?
Use unsanded grout for joints 1/8 inch or narrower, especially on glass tile where sand particles can scratch the surface. Use sanded grout for joints wider than 1/8 inch. It’s more structurally stable and less prone to cracking. For a standard backsplash installation with average-sized tile, unsanded is the more common choice.
Do I need a permit to install a backsplash in Austin?
No. Backsplash installation is cosmetic and doesn’t require a City of Austin permit. The exception is if the installation involves moving or adding electrical outlets. That does require a permit and licensed electrical work.
When does a stone slab backsplash make sense instead of tile?
Stone slab, one continuous piece of quartz, quartzite, or marble running up the wall, makes the most sense when you want zero grout lines, a seamless look, or a strong focal point behind the range. The trade-off is cost (material and fabrication are significantly higher than tile) and the fact that any damage typically means replacing the entire piece. It’s also less forgiving of an unlevel wall.
What’s the biggest backsplash mistake Austin homeowners make?
Choosing tile before choosing countertops and cabinets. The backsplash is the smallest surface of the three with the widest selection of options, which means it’s far easier to find tile that works with a fixed countertop than to find a countertop that works with tile you’ve already fallen in love with. Lock in the bigger surfaces first.
Does backsplash height affect resale value?
Full-height backsplashes signal a more intentional, well-executed kitchen remodel to buyers and appraisers. In Austin’s current buyer’s market, where buyers have time and leverage to scrutinize finishes, a 4-inch backsplash on a kitchen that’s otherwise been updated reads as an incomplete renovation. It won’t sink a sale, but it’s a detail buyers notice.
Thinking About a Kitchen Remodel?
From cabinets and countertops to full layout changes, we'll scope the project with you and give you a straight estimate. No guesswork.
Or call us at (512) 761-7336